My favorite type of food to cook is...?

Pages

Monday, April 26, 2010

2 Super Quick Sides


Looking back over my past post on this blog I see that I have been rather quick to talk about main meals. What would a main course be without great sides to go with it? These two side dishes are very common at my house simply because of how quick and easy they are to do. Pair these sides with any of the recipes from my 3 Fastest Entrees Post (http://parkfooddude.blogspot.com/2010/03/3-fastest-entrees-you-will-ever-make.html) , or serve them with your own main course.

Remember how I talked about the amazingness of parchment paper? Here's how it will turn cauliflower, my most detested of veggies, into something awesome.

Roasted Cauliflower

Ingredients

1 head cauliflower
3 tbsp extra virgin olive oil
Kosher Salt
Cracked Black Pepper

Preheat oven to 450 degrees. Line a heavy baking sheet with parchment paper. Cut cauliflower into 1.5 - 2 inch pieces and place in large bowl. Add olive oil and salt and pepper to taste (I do 2 heavy pinches of salt and 7-8 turn of the pepper mill). Toss the cauliflower to coat with oil and S&P. Arrange on baking sheet and place in middle rack of the oven. Roast until tender and browned on the edges, about 20-25 minutes, turning halfway. The pieces near the sides will brown more so re-arrange at halfway point. Taste for right amount of S&P and add more if desired. If you like you can add spices before roasting such as coriander, cumin, smoked paprika or chipotle powder but personally I think you should try it without the first time. You will be shocked at how sweet these pieces of cauliflower are!

This next one is so incredibly fast and easy. Can you make rice? Can you melt butter? Great! You are extremely qualified to make this!

Curried Rice

Ingredients

2 cups cooked rice
2 tbsp butter or margarine
2 tbsp finely minced onion
1 to 1.5 tsp medium curry powder (to taste)
Salt
Pepper

Cook 1 cup of rice using whatever method you prefer...stovetop, rice cooker or however you like. As long as you get 2 cups of rice at the end you are golden. Just as rice is done melt the butter in a pan and add the onion. Cook for a few minutes until tender. Stir in curry powder and add a good pinch of salt and a few grinds of pepper. Add butter mixture to the hot rice and stir to combine. You can add many things to your rice at this point. Some suggestions are toasted almond pieces, chopped pimentos or olives, capers or diced roasted peppers.

How easy was that? So go and make these! No excuse for not making easy sides for supper!

Cheers

PFD

Saturday, April 24, 2010

Hands Off My Jerky...Turkey!


Normally I would not be talking about a recipe that requires any special equipment but this is an exception. Summer is coming and with it comes all sorts of outdoorsy activities that may require you to pack light. Jerky might be the perfect food for those wanting a source of low fat protein that weighs next to nothing and is virtually indestructible. As long as you keep it dry and as air tight as possible it will keep for a very long time, years actually. But as I said this will require a small purchase of special equipment...a food dehydrator. These are not very expensive, 40 bucks will do ya. And if you have any qualms about shelling out $40 for something just to make jerky think of it this way. Jerky sells in the store for about $30/lb. You can make your own for about $5-6/lb. Pretty easy to figure out just how quickly you could pay for the dehydrator! (I'm pretty sure anyway....I am really bad at math)

Use inside round for best results. The meat is lean and well grained and cheap! Freeze the roast for about an hour. This will make the meat easier to slice. Using your sharpest knife slice the meat as thin as you can. The thinner the better for faster drying. Remove any fat that the can see or your jerky will end up greasy. Marinading the beef strips in a plastic bag in the fridge for at least 3 hours and up to 8 will give you the best flavor results.

Your choices of flavors for jerky are endless. I have made everything from plain hickory smoked flavors to sesame teryaki, sweet thai chili, maple mesquite and honey red hot. I will show you a very basic recipe that you can play with at your leisure.

Marinade

2/3 cup Worcestershire sauce
2/3 cup soy sauce
2 teaspoons ground black pepper
2 teaspoons onion or garlic powder
1 teaspoon liquid smoke
1 teaspoon smoked paprika
1 tablespoon honey or maple syrup
1 teaspoon chili flakes if you want some kick!

This marinade will work with 2 to 2.5 pounds of any red meat.

After marinading for 3-8 hours remove meat and place on cooling racks to drain off excess marinade. Place meat in the dehydrator and leave until desired texture is reached. The drier is gets the longer it will keep. Remove from machine and let cool on paper towels before placing in zip top bags for storage. You will have to pay some attention to your dehydrator as some of the have spots that seem to take longer than others. Shift your jerky strips around now and then and remove any pieces that have gotten to the dryness that you like.

So change up the spices! Change up the liquids! I really don't think it's possible to screw this one up! (OK, sure it is but I take absolutely no responsibility for someone who marinades this in cream soda and hot sauce). Let me know if you come up with anything brilliant that I can steal for myself!

Cheers

PFD

Monday, April 19, 2010

The Magic of Parchment Paper


Sometimes a solution to a cooking problem is so simple that you just can't believe it can be so easy. I used to make roasted potatoes or chicken wings in the oven and be very frustrated with the results. Both foods need to be cooked with high heat to achieve that browned outside and tender inside but when done on a baking sheet (or foil covered sheet) the food will stick badly to the sheet and become ruined. The secret to well browned food that doesn't stick, burn or come apart on you is parchment paper. You can get this at any supermarket in the same place you get foil and plastic wrap. DO NOT GET CONFUSED AND USE WAXED PAPER LIKE SOMEONE I KNOW ONCE DID!!! (not sayin' who)

A single layer of parchment paper on the baking sheet will allow you to cook so many foods in your oven. Below is one of my favorite recipes using this parchment paper trick!

Oven Roasted Potatoes

Ingredients

6 medium potatoes (russets or reds)
3 cloves garlic, minced
1.5 tsp dried rosemary (or more to taste)
salt and pepper
2-3 tbsp extra virgin olive oil

Preheat oven to 450 degrees. Cut potatoes into 1 inch dice and put into large bowl. Drizzle olive oil over potatoes and add rosemary, large pinch of salt and 5-6 grinds of pepper. Toss well to distribute spices and spread evenly over baking sheet lined with parchment paper. Place sheet on middle rack in oven and roast for approx 25 minutes or until browned to taste. If potatoes are not browning as much as you would like give them a little shot of cooking spray. Toss potatoes around to ensure browning on all sides. Give one a taste part way through and add more salt and pepper if desired.

I have a hard time keeping my potato stealing wife from thieving these off the sheet while cooking they are so good. Potatoes can be done as large wedges or even really small as hash browns. If you have a deep fryer that you like to use to make fries you may just throw it away after learning this healthier alternative.

Enjoy!

Tuesday, April 13, 2010

Food Dude's Big 5


This week's Big 5 is another great one (they're all pretty great though aren't they?). Have you got a book shelf full of cook books you never open? Or are you a blank slate and have not yet been given or bought any cookbooks that you are destined to look through once and then leave to gather dust? Chances are those two categories encompass most of you. Well I am here to save you all! Be amazed by...

The Big 5 Cookbooks You Should Own!

#1---How To Grill by Steven Raichlen

An amazing book on how to get the most out of your BBQ. Including the basics on tools, techniques and easy tips to make your grill work its magic this book has full color, step by step photo instructions that guide you the whole way. If you are like me and need things very well spelled out for you this book is for you. I am currently on my 2nd copy as I wore out my first and I have also given this book several times as a gift. I have probably cooked half of the recipes in this book and I can tell you (as can the people I have cooked for) that this book is the real deal. Pair this one with....

#2--Sauces, Rubs and Marinades by Steven Raichlen

Yeah I know...cheesy to use the same author twice but I am telling you that this book is a must have even if you don't buy the one listed above. 200 recipes of sauces, marinades, flavored butters, bastes and glazes from all over the world to use either with your grilled foods or with anything else. No matter what you are having for supper tonight this book will have something great to slather it in! I probably dig this book out of the cupboard twice a week just for inspiration on what to cook next. Steven Raichlen should be dipped in bronze and hailed as a BBQ deity.

#3--Barefoot Contessa at Home by Ina Garten

Those who have been paying attention know of my sweet spot for this former white house employee and her amazing comfort food recipes. While none of the recipes in this book are complicated they will amaze you with their big bright flavors and rich layers of goodness. Make sure you try the Garlic and Herb Tomatoes and the Maple Baked Beans!

#4--Cook with Jaimie by Jaimie Oliver

This thick tome is almost as fun to read as it is to cook with. The light hearted Oliver seems to be with you in the kitchen teaching you how to enjoy your cooking efforts while not getting too serious about the whole affair. A great color photo for each recipe will inspire you to try some of the seemingly stranger recipes in here (try the roasted pork belly with braised fennel!). Also sales of these books go towards Jaimie's Fifteen Foundation where he takes hard done by kids and teaches them to cook and work all over the world.

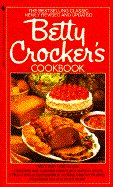
#5--Betty Crocker's Big Red Cookbook

Currently in its 10th printing the Big Red Book has been helping out kitchens for close to 60 years. While it may not be fancy and full of jaw dropping photos this book is one that you simply cannot do without. It is my go to book for all the things I should remember and yet cannot seem to keep in my head. What temperature to start a roast beef at? What internal temp does the chicken have to get to? How do I carve this ham? All those questions have their answers in there and they are easy to find too. Along with helpful hints like substitutions and an array of conversion tables I will always have a copy of this cookbook in my kitchen.


That's a good base for any cooking library! Tell me what you think and what your favorite recipe book is!

Cheers

PFD

Tuesday, April 6, 2010

5 courses, 5 recipes Part 5


OK folks, it's time to pay attention. You have wowed your guests with some great food and now you have to knock it out of the park to seal the deal to make a lasting impression. If you fall flat with dessert that's what people will remember. Send them home on a high note with the most classic and indulgent dessert of them all...creme brulee! There are many creme brulee recipes out there and they are all pretty close to the same, except for those no-bake ones. Combining egg yolks and heavy cream into a baked vanilla custard with flamed sugar on top....you will think twice about serving them and maybe just hide in the closet to devour them on your own.

You will need a small kitchen torch to properly brown the sugar on the top of these. You can get this at specialty kitchen store and they are not too expensive. It is also possible to do this under the broiler on your oven but I have found it does not work as well.

Creme Brulee

Ingredients

1 quart heavy cream
1 vanilla bean, split and scraped
1 cup vanilla sugar, divided (regular sugar works just fine)
6 large egg yolks
2 quarts hot water

Directions
Preheat the oven to 325 degrees F.

Place the cream, vanilla bean and its pulp into a medium saucepan set over medium-high heat and bring to a boil. Remove from the heat, cover and allow to sit for 15 minutes.

In a medium bowl, whisk together 1/2 cup sugar and the egg yolks until well blended and it just starts to lighten in color. Add the cream a little at a time, stirring continually. Pour the liquid into 6 (7 to 8-ounce) ramekins. Place the ramekins into a large cake pan or roasting pan. Pour enough hot water into the pan to come halfway up the sides of the ramekins. Bake just until the creme brulee is set, but still trembling in the center, approximately 40 to 45 minutes. Remove the ramekins from the roasting pan and refrigerate for at least 2 hours and up to 3 days.

Remove the creme brulee from the refrigerator for at least 30 minutes prior to browning the sugar on top. Divide the remaining 1/2 cup vanilla sugar equally among the 6 dishes and spread evenly on top. Using a torch, melt the sugar and form a crispy top. Allow the creme brulee to sit for at least 5 minutes before serving. If you choose to do the oven broil method for the sugar top put the ramekins in the freezer for about 20 minutes to really chill them and the broil until done, while watching them closely.

Serves 6

This is truly one of the most decadent desserts ever created and it will definitely cap your dinner party off beautifully. What more can I say? Go on....go make it!


So that brings our 5 course dinner party to a close. Maybe you will try these recipes out and have a dinner party of your own or maybe you'll just try one or two. Either way please let me know how they turn out for you!

Cheers

PFD

Thursday, April 1, 2010

5 courses, 5 recipes Part 4


Hey all! Just ahead lies the main course for our 5 course dinner party and I think you will be pleasantly surprised. Most of you were probably thinking that it would be something like a big roast of beef, a whole BBQed salmon or maybe some kind of smoked duck but NO! This simple yet beautiful main looks so amazing and is so very different that people will be greatly impressed. So get ready for...

Super Stuffed Peppers

Ingredients

1 tablespoon oil
1/2 pound chorizo sausage
1/2 red bell pepper, diced
1/2 green bell pepper, diced
1 jalapeno, minced
1 red onion, diced
2 tablespoons garlic, minced
1 cup short-grain rice
1 cup low-sodium chicken stock
1/2 cup white wine
1/2 cup water
6 large, fresh poblano chiles or green bell peppers
1 pound shrimp, shelled, cut into 1/2-inch pieces
3/4 cup Cheddar, shredded
3/4 cup Jack cheese, shredded

Directions
In a medium saucepan, heat oil and chorizo, cook for 3 minutes. Add peppers, jalapeno, onions and garlic. Cook until translucent, then add rice and cook until all the grains of the rice are coated with oil. Add all liquids and stir over high heat for 3 minutes, cover and reduce heat to low. Check rice for doneness after 20 minutes.

Preheat oven to 400 degrees F.

Place peppers on baking sheet and bake for 15 minutes. Remove from oven and let cool. Once cool, cut top 1/4 of pepper off and remove ribs and seeds.

When rice is finished cooking, fluff with fork and stir in shrimp. Stuff chiles with 1/6 of the rice mixture. Place all the chiles on baking sheet and place into oven for 10 minutes. Remove from oven, mix cheeses together and cover pepper with cheese. Broil for 3 minutes to melt and brown the cheese.


Voila! This stuffed pepper looks so amazing on the plate your guests will feel bad about cutting into it! Full of rice, shrimp and sausage this is one hearty main. You can really use whatever cheeses you like but I think the cheddar and jack cheeses really pair the best with this. Enjoy!

Next up, our final course.....dessert!

Cheers

PFD

Wednesday, March 31, 2010

5 Courses, 5 Recipes Part 3


It's salad time! I know some of you are thinking "Yay. Salad. I'll skip this one and wait for tomorrow's recipe." Don't. Try thinking of salads as more than your basic lettuce and tomato combinations and see how different they can be while adding a special touch to your dinners. This salad really tested my belief in that since I never really liked to eat beets. But what a salad! Perfectly balanced flavor and amazing color that will definitelty impress your guests. This salad is one of Jaimie Oliver's who is as great a cook as he is boyishly handsome (errrrrr...remind me to edit that part out before I publish).

Do not put this salad together too early as the beet coloring will bleed into the other ingredients and it won't look as nice. Have everything cut before hand and assemble minutes before serving.

Beet Salad with Feta and Pear

Ingredients

4 medium sized beets, washed and peeled
3 ripe pears peeled and cored (make sure they are not too ripe...you want crunchy)
7 oz feta cheese
A few leaves of fresh mint
Handful of sunflower seeds (optional)
Salt and Pepper
Lemon Oil Dressing (recipe below)

Cut your beets and pears into thin matchsticks with a good sharp knife or mandolin. Crumble feta cheese into small bits. When ready to assemble salad combine the beet and pear and dress with Lemon Oil dressing:


Dressing


Juice of one fresh lemon
10 tbsp Extra Virgin Olive Oil
Salt and Pepper

Mix dressing ingredients vigorously and taste for seasoning.

Divide dressed beets and pears onto 4 small plates and top with crumbled feta. Add sunflower seeds if using and sprinkle small mint leaves on top.

Serves 4


Done! Easy huh? I have complete confidence that you can pull this off without match sticking your fingers too. Once you see that salads can be made from just about anything you'll have a massive salad aresenal to wow people with. Enjoy!

Next up.....The Mighty Main Course!

Cheers

PFD